Mastering Rock Carving Techniques with a Dremel
Intro
Rock carving represents a unique blend of artistry and craftsmanship, offering a way to transform unyielding stone into captivating forms. Among the various tools accessible to artists and hobbyists alike, a Dremel tool stands out as an essential ally.
The journey into rock carving can be as enriching as the art itself — whether you're a beginner armed with curiosity or a seasoned artisan looking to refine your skills. This guide highlights not just the techniques of employing a Dremel, but also provides insights into the historical context of this captivating craft, its materials, and practical advice to enhance your carving experience. Through understanding both the art's evolution and the fundamentals of using a Dremel tool, enthusiasts will garner not only useful knowledge but also greater inspiration for their artistic ventures.
The process of carving rocks involves patience, precision, and a touch of creativity. This article emphasizes key methods, tools, and safety measures that ensure a fulfilling experience for both novices and practiced carvers. You'll also uncover the types of stones that are best for carving and learn to navigate common challenges that arise throughout the process. Whether you are working on a sculptural masterpiece or a subtle ornament, every detail matters in achieving remarkable results.
Intro to Rock Carving with Dremel Tools
Rock carving is a fascinating art form that opens up boundless opportunities for creativity. Utilizing a Dremel tool for carving has revolutionized how enthusiasts approach this craft. Whether you are a seasoned hobbyist looking to refine your skills or a newcomer eager to explore, understanding the basics of rock carving with a Dremel can significantly enhance your artistic journey. This section will lay the groundwork for what follows, emphasizing essential techniques, tools, and considerations that will empower you to embark on your rock carving endeavors.
The Evolution of Rock Carving
Historically, humans have sculpted rock for millennia, from ancient cave carvings to grand monuments. Originally, chisels and hammers were the go-to tools, but with advances in technology, carving has evolved. The introduction of electric tools, particularly Dremel devices, has enabled carvers to achieve precision and detail that was once unthinkable. Today’s Dremel tools offer adjustable speeds and a variety of attachments, making them particularly suited for intricate designs while drastically reducing the physical labor involved. This evolution reflects a larger trend in crafting, where technology not only enhances creativity but also democratizes art-making through easier access and greater versatility.
Why Choose a Dremel for Rock Carving?
Opting for a Dremel tool over traditional carving methods has numerous advantages:
- Precision Control: Dremel tools provide a level of control that allows for delicate details and fine lines that could be challenging to achieve with standard tools.
- Versatile Attachments: There is a wide array of bits and attachments available for different types of effects, from sanding to engraving, allowing carvers to experiment without buying multiple tools.
- Comfort and Ergonomics: Unlike heavy chisels, Dremel tools are lightweight and ergonomically designed, enabling longer working sessions without fatigue.
- Time Efficiency: Carving with a Dremel often speeds up the process, allowing artists to spend more time creating rather than laboring over each stroke.
One of the remarkable features is that Dremel tools are suitable for various stone types. Whether you’re working with soft soapstone or harder granite, there’s a Dremel attachment for you. This versatility makes it a preferred choice for many rock lovers and artisans.
"With a Dremel in hand, the world of rock carving becomes accessible, inviting exploration and artistry in ways that traditional methods rarely allowed."
Understanding and mastering the use of a Dremel opens doors to techniques that can transform simple stones into detailed works of art. Armed with this knowledge, you’re ready to dive deeper into the tools and techniques that will hone your rock carving skills.
Understanding the Dremel Tool and Its Capabilities
When delving into the world of rock carving, understanding the tool you're about to wield is as crucial as selecting the right stone. The Dremel is a versatile rotary tool that brings precision and ease to this intricate craft. By grasping its capabilities, you can make informed choices that not only elevate your artistry but also streamline your workflow.
The Dremel tool's significance lies in its adaptability. From shaping and contouring to engraving and sanding, it can take on various functions, making it invaluable for both beginners and seasoned rock carvers. Familiarizing yourself with how the tool operates, its speed settings, and power can significantly enhance your carving experience. Beyond the functionality, the Dremel's ergonomic design allows for comfortable use over extended periods, which is essential when you're engrossed in the painstaking art of rock carving.
Different Models and Their Features
Dremel offers a range of models that cater to different levels and purposes. Here are a few options to consider:
- Dremel 3000: This model is perfect for beginners. It features a multi-tool design that accommodates various accessories, making it suitable for multiple projects, including rock carving. Its lightweight feel helps reduce fatigue during long carving sessions.
- Dremel 4000: For those who are serious about their craft, the 4000 model provides more power and speed settings. This means you can execute more intricate designs on harder stones with greater control.
- Dremel 8200: Equipped with a lithium-ion battery, it offers the advantage of cordless freedom. This model is great for outdoor projects where a power source may not be available, providing flexibility without compromising on performance.
Each model comes with unique features that cater to different needs. You must assess what fits your skill level and project requirements best. Knowing which specific capabilities are essential for your carving style can save you time and frustration in the long run.
Essential Attachments for Rock Carving
A Dremel is only as good as its attachments. Using the right accessories can enhance your carving performance considerably. Here are some of the recommended attachments for rock carving:
- Diamond Bits: These are indispensable for precision work. Different shapes and sizes allow for varied levels of detailing, from fine engraving to shaping a rough stone.
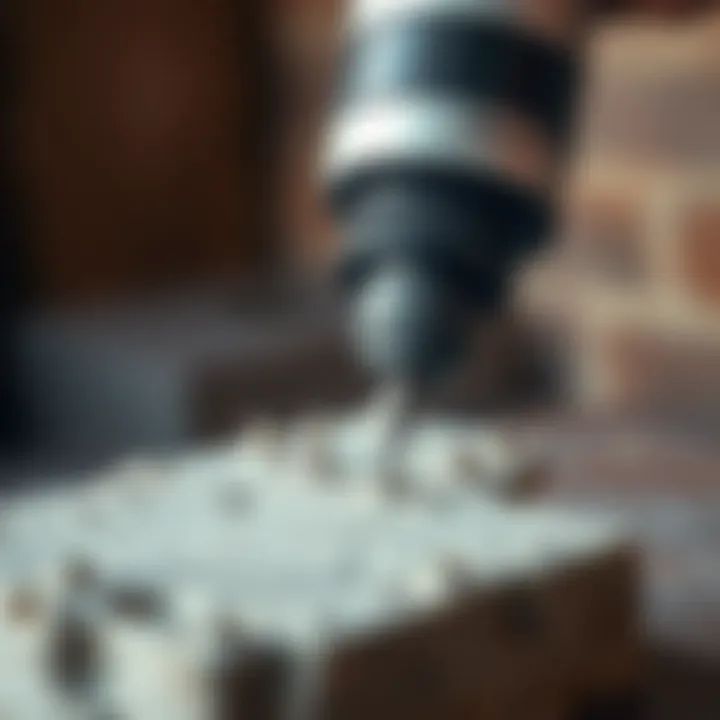
- Drill Bits: Useful for creating holes or deeper patterns, they enable you to add intricacies to your projects effectively.
- Sanding Bands: If you’re looking to smooth out surfaces or refine edges, sanding bands are helpful. They come in various grits, allowing you to tailor your finish according to the project’s needs.
- Polishing Pads: For that final touch, polishing pads bring out the natural luster in stones, ensuring your artwork doesn’t just look good but gleams with finesse.
These attachments can profoundly affect the final outcome of your work. It's advisable to invest in a quality kit that offers a wide array of options, catering to various facets of rock carving. Not only does this broaden your toolset, but it also allows you to take on diverse projects with confidence.
Make sure to read the manual that comes with your Dremel. Understanding the proper use of each attachment lays the foundation for successful carving.
In summary, taking the time to understand your Dremel tool and its capabilities is a step you should not overlook. Having the right model and attachments lined up can make all the difference in your rock carving journey.
Choosing the Right Type of Rock for Carving
Choosing the right type of rock for carving is a pivotal step in ensuring the success of your project. Not all rocks are created equal, and selecting a stone that suits your vision and skill level can make the difference between a satisfying creation and a frustrating experience. Various elements come into play when deciding on the type of rock. Hardness, the stone's structure, and the intended design are all critical factors that can shape your carving journey.
Benefits of Choosing the Right Stone:
- Ease of Carving: Softer stones such as soapstone or alabaster are more forgiving and easier to work with compared to harder types like granite or marble. They allow for intricate designs even for beginners.
- Finish Quality: The stone's ability to hold a polish can significantly affect the aesthetic outcome. Stones with a finer grain typically accept polishing better, giving your piece a vibrant, reflective finish.
- Durability: Different placements and uses require varying degrees of durability. If your final product is meant for outdoor use, it's critical to select a rock that can withstand the elements without degrading.
You must also consider your own skill level and tools. While advanced carvers may relish the challenge presented by tougher materials, novices often benefit from starting with softer stones to build confidence and skills. The variety of rocks available can make this process both exciting and daunting, but when approached with thoughtful consideration, it paves the way for remarkable carvings.
Popular Stones for Carving Projects
When it comes to rock carving, certain stones have carved out (pun intended) a reputation among artisans for their workability and beauty. Here’s a list of some popular choices:
- Soapstone: Known for its softness, soapstone is a favorite among beginners. It comes in various colors and has a smooth texture, making it perfect for carving simple shapes.
- Alabaster: This stone has a fine grain that allows for delicate detailing. It's often used for figurative work and holds a beautiful finish.
- Limestone: A bit tougher than soapstone, limestone is still manageable for novice carvers. It’s often appreciated for its natural shading and variety of colors.
- Basalt: As a volcanic rock, basalt is much denser and tougher to carve but can produce stunning results. It’s certainly more suited for those with some experience.
- Marble: The classic carving medium, marble, is prized for its beauty but can be quite challenging, requiring the right tools and techniques.
Each stone offers unique characteristics that can enhance or inhibit your project. Consider experimenting with various materials before settling on just one.
Evaluating Rock Quality and Texture
Once you've narrowed down the types of stones available, the next step is evaluating the quality and texture of the rock. Here are key elements to look out for:
- Grain Structure: You want consistent grain running throughout the stone without obvious cracks or gaps. A smoother grain ensures a more uniform carving experience.
- Color Evenness: While some stones might have natural variations in color, it’s vital to ensure that there are no random flecks or discolorations that could detract from your intended design.
- Hardness Rating: Using the Mohs scale can help determine the hardness of stones. Softer stones score lower on the scale (like soapstone at about 1), while harder ones (like diamond at 10) rank extremely high.
- Surface Integrity: Check the stone for any fractures, chips, or fissures. Such imperfections can weaken the rock and lead to issues later in carving.
Ultimately, choosing the right stone is not merely about aesthetics; it's a strategic decision based on your artistic vision and practical skills. By carefully evaluating stones based on quality and texture, you can set yourself up for success in your rock carving endeavors.
Techniques for Effective Rock Carving
When it comes to rock carving, the right techniques can make all the difference. Techniques are not just about the movements; they encapsulate the rhythm, the precision, and the approach an artist takes with their Dremel. Mastery in carving requires not only knowledge but also a certain level of hands-on practice. The significance of these methods is fundamental in creating beautiful pieces of art, enhancing the overall craftsmanship while minimizing errors.
The benefits are manifold. Proper techniques help you achieve cleaner cuts, ensure even surfaces, and avoid unnecessary wastage of material. Moreover, an understanding of various carving methods can elevate the quality of your work, allowing you to experiment and even develop a personal style. As every rock presents unique challenges, adapting your techniques to suit each piece is vital.Even the most seasoned carvers continually refine their skills as they explore new approaches.
Basic Carving Techniques
Getting started with rock carving, especially using a Dremel, can be a tad daunting. Basic techniques serve as a foundation from which more advanced practices can grow.
- Grip and Posture: Start by ensuring you have a firm grip on the Dremel. Your hands should rest comfortably, as fatigue can lead to errors. Balance your body to maintain stability—standing directly in front of your workpiece often yields the best control.
- Outline First: When starting a project, outline your design using a soft pencil or chalk. This way, you have a clear pathway to follow, allowing for more precision as you start carving.
- Using Different Bits: Each Dremel bit offers different textures and depths. Begin with larger bits for rough shaping, then switch to finer bits for details. This gradual approach helps you avoid overwhelming the rock and makes adjustments simpler.
- Pacing Yourself: Patience is a virtue in rock carving. Gradually increase your speed as you gain confidence. Quick movements can lead to mistakes that are often difficult to rectify.
Advanced Carving Methods
Once you have mastered the basics, you can branch out into advanced carving methods. These techniques push the boundaries of what you can create, helping you achieve stunning textures and intricate designs.
- Layering: This involves carving at different depths to provide a three-dimensional effect. Start by carving shallow grooves and progressively deepen them in layers. This is where the Dremel shines, as it can navigate through various depths smoothly.
- Incorporating Shapes: Move beyond flat surfaces and explore more complex shapes, including curves and contours. This may require a bit of practice, but wonderful forms like spirals or organic shapes can emerge beautifully with dedication.
- Speed Control: With experience, you’ll learn to control your Dremel's speed for different processes. Use lower speeds for detailed work to avoid chipping and higher speeds for removing larger amounts of stone.
Incorporating Textures and Patterns
Having learned basic and advanced techniques, the next step is to bring your work to life with textures and patterns. These add dimension and character to your pieces, bestowing them with a unique artistic aura.
- Texturing Tools: Utilize specific bits for texture work. For instance, a diamond bit creates a distinct shine, while a ceramic bit may add an intriguing roughness. Experimenting with different textures can enhance the visual appeal of your carvings.
- Creating Patterns: Think about patterns that resonate with your design intention. You can carve geometric patterns, organic lines, or even replicate natural textures found in the rock itself. It is often beneficial to practice on scraps to perfect your approach.
- Layered Textures: Combine multiple textures within a single piece. This could mean using a glossy finish alongside rough areas to create a striking contrast, really drawing the eye to specific parts of your work.
Ultimately, the beauty of rock carving lies in experimenting with these techniques. The more you try, the more you learn about the materials and the art form itself.
Crafting Safety Measures
When stepping into the world of rock carving with a Dremel, prioritizing safety isn't just a good idea; it's essential. Working with tools and materials can elevate the risk of accidents and injuries if proper measures aren’t put in place. Crafting safety measures involves being aware of potential hazards and implementing strategies to mitigate risks. It not only protects the artisan but also enhances the overall experience of creating art from stone.
First, consider the workspace. It should be well-ventilated to ensure that harmful dust doesn't linger. This is particularly crucial when working with certain types of stones like granite, which can release silica dust that’s not good for your lungs.
Essential Safety Gear for Carving
To safeguard your wellbeing while carving, equip yourself with the proper safety gear. Depending on your technique and material, the following items can be beneficial:
- Safety Goggles: Protect your eyes from flying bits of rock.
- Dust Mask: A quality dust mask, or respirator, can significantly lower the inhalation of harmful particles. Make sure it's rated for fine dust filtration.
- Hearing Protection: Dremel tools can be loud, and prolonged exposure can damage your hearing. Simple earplugs might do the trick, but earmuffs can provide additional protection.
- Gloves: While these can be tricky with precision work, protective gloves can shield your hands from sharp edges and debris.
- Apron: A durable work apron might not seem crucial, but it can prevent metal filings or dust from getting into your clothes.
It might seem like a hassle to put on this gear each time, but it’s a small price to pay for your safety. As the saying goes, better safe than sorry.
Creating a Safe Workspace
A well-thought-out workspace can make all the difference in enhancing safety during rock carving. Here are a few considerations:
- Choose the Right Location: Ideally, your workspace should be in a well-ventilated area to minimize dust build-up. If that’s not an option, consider using a fan or air purifier.
- Organize Tools and Materials: Keep your workspace tidy. Clutter can lead to accidents. Organizing tools, materials, and dust collection equipment will prevent missteps that could cause injuries.
- Stable Surface: Use a sturdy table or workbench that can withstand vibrations and movement caused by the Dremel. This will help reduce the risk of tipping over or losing control of the tool while in use.
- Secure Your Material: Before you start, ensure that your rock is securely held in place. Clamping it down or using a dedicated carving base can help you gain a better grip and prevent unexpected slips.
- Avoid Distractions: Your attention is a tool itself. It's easy to lose focus—turn off loud music or any distracting devices while you work.
Safety first! Taking time to prepare your workspace and gear will not only enhance your carving experience but also help you produce better results.
By adopting a proactive approach to safety, you set the foundation for an enjoyable and productive carving journey. Remember, it's not just about creating; it's about creating safely.
Common Challenges in Rock Carving and Solutions
Rock carving is a deeply rewarding endeavor, but, like any artistic pursuit, it comes with its own set of hurdles. Understanding these challenges can save both time and frustration. As you dive into the world of rock carving with your Dremel, recognizing potential pitfalls allows for better preparation. Knowing how to handle issues—be it the fragility of the stone or the mess created during this craft—will not only enhance your carving experience but also elevate the quality of your work. Let's tackle some of these specific challenges and offer tangible solutions.
Dealing with Breakage and Cracking
One of the most heart-wrenching moments for any rock carver is when a beloved piece crumbles or cracks unexpectedly. This issue can arise from various factors, including the type of stone chosen, the carving techniques applied, or even the tools used.
Here are some strategies to mitigate breakage:
- Choose Suitable Stone: Not all stones are created equal. Softer stones like soapstone or alabaster are less prone to cracking under pressure than harder materials. If you have your heart set on a more brittle stone, ensure it has a uniform consistency without visible flaws.
- Steady Your Hand: A shaky hand can lead to unnecessary pressure on specific points, causing cracks. Practice controlling your Dremel for even strokes and apply consistent pressure throughout your carving.
- Work in Layers: Instead of chiseling away at the stone all at once, consider removing material in layers. This helps alleviate tension in the stone, lowering the risk of cracks forming.
Finishing Touches: Enhancing Your Carving
Finishing touches play a crucial role in the art of rock carving. These final steps elevate your piece from a mere collection of stone shavings to a polished creation with depth and character. Engaging in this part of the craft allows you to showcase your work with pride. Whether for personal enjoyment or exhibition, a well-finished carving reflects the quality of your work and your dedication to the art.
Polishing Techniques for Rocks
Polishing is an art in itself. It not only highlights the natural beauty of the stone but also protects it from wear and tear. Here are some common techniques for polishing rocks:
- Sanding: Start with a coarse grit sandpaper to remove rough edges, then gradually move to finer grits. This step encourages a smooth texture and prepares the rock for buffing.
- Buffing: Using a buffing wheel attached to your Dremel can dramatically enhance lustre. Compound polish can be used during this process to achieve that striking shine.
- Wet Polishing: Water can be used to cool the stone and reduce dust during the finishing process. Consider using a wet sanding technique if your stone permits it.


Many artisans prefer to keep their polishing techniques a little secret! This can include the type of polishing compounds they use or even the timing of when to shift grits. The magic often lies in the subtleties. Ultimately, the goal is to bring out the inner beauty of the stone, captivating anyone who gazes upon it.
Applying Sealants and Finishes
Once the polishing process is complete, it’s essential to protect your work. Sealants and finishes come into play here. They can enhance the color, provide a barrier against moisture, and add another layer of beauty.
- Types of Sealants: There are penetrating sealants that soak into the stone and surface sealants that coat it. Depending on the type of rock and its use, your choice of sealant might vary.
- Finishing Coats: Some artisans choose to use wax as a final finish to give a warm glow to the surface. Others might use an acrylic or polyurethane finish for added durability.
"A good finish can make an ordinary piece of rock look extraordinary."
When applying these products, be sure to follow the manufacturer’s instructions. It’s also worthwhile to conduct tests on scrap pieces of stone to see how different finishes affect the final appearance. By taking the time to apply these finishes thoughtfully, you can ensure that your art stands the test of time and continues to inspire admiration.
In summary, the finishing touches in rock carving are not just about aesthetics; they're about preservation and making your art stand out. Mastering these techniques will undoubtedly enhance your overall craftsmanship, leaving you with pieces that speak to your artistic vision and skill.
Inspiration and Resources for Rock Carvers
When it comes to rock carving, inspiration and resources serve as the bedrock of continuous growth, creativity, and proficiency. Being an artist involves not only the execution of techniques but also the influence of various creative stimuli. This section delves into how surrounding oneself with powerful sources of inspiration and tapping into valuable resources can ignite a carver's imagination and skill.
Notable Rock Artisans and Their Works
Throughout history, many rock artisans have left their mark on the world, creating pieces that transcend time and culture. These individuals often serve as the guiding lights for aspiring carvers, showing them what is possible with dedication and creativity.
One such artisan, Mikado Saito, who hails from Japan, specializes in intricate stone sculptures that beautifully represent natural elements. His work, particularly the famous "Buddha in Stone," displays unparalleled skill in detail and form, inspiring those who wish to portray realism and elegance in their carvings.
Another notable figure is Marjorie Minto, a self-proclaimed rock carver from the United States. Marjorie's captivating use of color and texture not only elevates traditional rock carving but also invites others to explore mixed media applications in stone art. Her famous series of carvings of local wildlife encourages artists to observe their surroundings and integrate elements that resonate with them personally.
Following their works on social platforms and art exhibitions can provide you with a fresh perspective on rock carving. It reminds you that although techniques are crucial, the heart of artistry lies in personal expression.
Online Communities and Forums
In today's digital age, online platforms have become fertile grounds for creativity and skill enhancement. Active participation in online communities dedicated to rock carving can offer substantial benefits. It acts as a conduit for learning, motivation, and networking with like-minded individuals.
Reddit, for instance, hosts several channels related to stone art. A subreddit such as r/rockcarving is a treasure trove of shared experiences and advice from both amateurs and seasoned professionals. Members post their projects, providing feedback and encouragement, which can bolster your own carving endeavors.
Facebook groups also provide a similar platform for sharing and dialogue. Groups like "Stone Art and Carving" allow you to interact globally, showcasing your work and seeking advice in a supportive environment. Sharing your challenges and observing others' successes can pave the way for overcoming obstacles in your own projects.
Furthermore, platforms like YouTube offer a plethora of tutorials and firsthand accounts from established rock carvers. Learning visually can deepen your understanding and expand your toolkit. Videos showing detailed processes often inspire innovative techniques, and their easy accessibility means you can learn at your own pace.
The End: Mastering Rock Carving Techniques
As we draw this exploration of rock carving with Dremel tools to a close, it's vital to recognize the depth and breadth of what this creative pursuit entails. This article has unearthed a treasure trove of insights, aimed not just at imparting knowledge but at fostering a deeper appreciation for the art of carving in stone. Understanding the intricacies of this craft can be both rewarding and fulfilling, whether one is a seasoned artist or just starting out.
Recap of Key Takeaways
The journey through the realms of rock carving reveals numerous key elements that stand out:
- Equipment Proficiency: Knowing your Dremel tool inside out allows for better control and more precision in your work.
- Choosing the Right Rock: Different stones yield different results; understanding their textures and properties can influence your carving significantly.
- Safety First: Prioritizing safety gear safeguards your well-being, making the carving experience enjoyable and risk-free.
- Techniques Matter: Mastering both basic and advanced techniques can elevate the quality of your creations substantially, while experimenting with textures can bring unique facets to your art.
- Continuous Learning: As with any artistic discipline, remaining open to new methods, materials, and successes aids in personal growth and mastery of the craft.
This synthesis of knowledge not only enhances one's practical skills but nurtures an artistic mindset that can blossom with every carving endeavor.
Encouragement for Continuous Learning and Practice
The essence of mastering rock carving with a Dremel lies in persistence and passion. It’s not merely about achieving perfection on the first try; rather, it’s about embracing the journey and the learning moments along the way. Every sculpted piece tells a story—not just of the stone itself, but also of the carver’s evolution and grit.
Engaging with communities, sharing experiences, and seeking feedback can provide invaluable insights. Participating in discussions on platforms like reddit.com/r/rockcarving opens doors to new ideas and techniques while also connecting you with like-minded individuals. It’s often where solutions to common challenges can be found, allowing for a collaborative growth experience.
In short, don’t put down your Dremel just because you face hurdles. Instead, let them fuel your enthusiasm for honing your craftsmanship. Each chip, each curve you carve, is a step towards something exquisite. Keep carving, keep learning, and let your artistic journey continue to unfold.


